Creating projects
On the basis of a project plan that specifies the phases of the project and their temporal conditions, you can now start to create the project and its phases.
• Select in the top menu of the folder where you want to create the project.
• The action form ‘Add Project’ has three sections. In section ‘General’ you enter name, description as well as start date and completion date. You may also enter tags characterizing the project. Apart from the name, all specifications are optional. If you don’t enter temporal conditions, however, you receive no support of work progress control.
• In section ‘Phases’ you click on [Add phase] in order to create a project phase, again with name, tags, description, start date and completion date. All specifications apart from the name are optional, but the absence of temporal conditions also means that work progress cannot be monitored.
You may add further project phases by clicking [Add phase] again. Also after creation of the project you may still add, change and delete phases.
• In section ‘Attributes’ you may enter attributes for the project (by default category and priority).
• Hit [OK] to create the project.
After you have created the project and its phases, you may now add the project team. You invite all persons who are involved in the project in the role of Member using in the top menu of the project. Thereafter all members of the project team may access project documents and may create, carry out and coordinate tasks. You cannot invite further members to the phases of a project, i.e. the members of the project phases are exactly the members of the project.
As an example, Figure 25 shows the development project “Substitution of the commission settlement system” for an insurance company. The project is divided into seven phases. Some of the project phases follow one another strictly in time, some overlap.
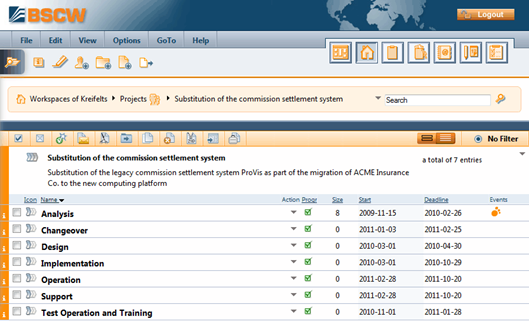
Figure 25: Project with seven phases
In order to have phase and project properties also shown in folder listings, select in the top menu and in the section ‘Columns’ choose the columns ‘Start’, ‘Deadline’ and ‘Progress’ for display. The deadline of a phase or project corresponds to the completion date planned.